I’ve been paranoid about my SSH keys for a while now. They just sit there in ~/.ssh/, protected by nothing but file permissions. Any malicious script that gets access to my filesystem could just copy them and — boom — access to all my servers.
Also, there have been many stories out there online about fake interview assignments that asked to clone a repo and run it on your local machine.
This is one of the reasons I switched completely to using devcontainers, but even that was not really enough for me (and it shouldn’t be enough for you or anybody else really).
So I finally decided to do something about it.
TL;DR
I have decided to NOT go with the native macOS Secure Enclave approach (using only out-of-the-box tools) because it ended up plain ugly and I can’t live with that. However, it is a fully functional, working solution that I would definitely use otherwise.
The Options
After some research, I found several ways to protect SSH keys:
- Native macOS Secure Enclave — no third-party apps, built into the OS
- Secretive — third-party app that stores keys in Secure Enclave
- YubiKey — hardware security key with FIDO2 support
- 1Password / Bitwarden — store keys in an encrypted vault, use their SSH agent
I already use 1Password, but I might switch to something else in the future. Bitwarden recently added SSH key support (even on the free tier!), but it’s still a software solution — the keys are encrypted at rest but decrypted in memory when used.
What I really wanted was hardware-backed security. The private key should literally be impossible to extract, even if my Mac is fully compromised.
That left me with YubiKey or Secure Enclave. I have a YubiKey 5C, but I wanted to try the native approach first — no extra hardware to carry around, no third-party apps to maintain.
What is Secure Enclave SSH?
Here’s the cool part: since macOS Sequoia (and Tahoe), Apple quietly added native support for Secure Enclave-backed SSH keys. The private key lives inside the Secure Enclave hardware — a dedicated security chip that’s physically separate from the main processor. The key never leaves this chip. Ever.
When you SSH somewhere, your Mac asks the Secure Enclave to sign the authentication challenge. If you enable Touch ID, you have to approve each signing operation. The actual private key never exists in memory or on disk.
The workflow is surprisingly similar to regular SSH keys:
| Aspect | Regular SSH Key | Secure Enclave Key |
|---|---|---|
| Where private key lives | ~/.ssh/id_ed25519 (a file) | Secure Enclave chip |
| What’s on disk | Actual private key | Just a reference (useless without this Mac) |
| Setup on remote server | Copy public key to authorized_keys | Same |
| Connecting | Just works | Touch ID prompt, then works |
Setting It Up
Step 1: Create the Secure Enclave Key
macOS provides the sc_auth command (Smart Card Authentication) to manage CryptoTokenKit identities. Despite the name, it works with Secure Enclave too.
sc_auth create-ctk-identity -l "ssh-MacBook" -k p-256-ne -t bio
Breaking this down:
-l "ssh-MacBook"— a label for your reference (only visible locally)-k p-256-ne— NIST P-256 curve, non-exportable (the key can never leave Secure Enclave)-t bio— require biometric (Touch ID) for every use
You’ll be prompted for Touch ID to create the key.
🚨 Problem #1: Touch ID Error
When I first ran this command, I got a scary error:
Error: Error Domain=NSOSStatusErrorDomain Code=-25293 "Failed to generate keypair"
(errKCAuthFailed / errSecAuthFailed: / Authorization/Authentication failed.)
UserInfo={..., NSUnderlyingError=... "Failed to get bio catacomb UUID for user 502." ...}
Turns out my Touch ID enrollment got reset somehow. After re-enrolling my fingerprint in System Settings → Touch ID & Password, the command worked fine.
You can verify the key was created:
sc_auth list-ctk-identities
Output:
Key Type Public Key Hash                          Prot Label       Common Name  Valid To          Valid
p-256-ne A71277F0BC5825A7B3576D014F31282A866EF3BC bio  ssh-MacBook ssh-MacBook  2027-01-26, 10:18 YES
Step 2: Export the Key Handle
Now we need to create a “key handle” file that SSH can use. This is NOT the private key — it’s just a reference that tells SSH “go ask the Secure Enclave to sign this.”
ssh-keygen -w /usr/lib/ssh-keychain.dylib -K -N ""
When prompted for PIN, just press Enter (it’s not used for biometric keys). Touch ID will pop up. This creates id_ecdsa_sk_rk and id_ecdsa_sk_rk.pub in your current directory.
Move them to your SSH directory:
mv id_ecdsa_sk_rk* ~/.ssh/
Step 3: Configure SSH to Use the Secure Enclave Provider
Add this to your ~/.zshrc (or ~/.bashrc):
export SSH_SK_PROVIDER=/usr/lib/ssh-keychain.dylib
Reload your shell:
source ~/.zshrc
🚨 Problem #2: Outdated Commands Everywhere
If you search for “macOS Secure Enclave SSH” online, you’ll find a lot of guides telling you to run ssh-add -K. Don’t. It’s deprecated:
WARNING: The -K and -A flags are deprecated and have been replaced
         by the --apple-use-keychain and --apple-load-keychain
         flags, respectively.
And even the new flags don’t work for Secure Enclave keys — they’re for the traditional macOS Keychain, not CryptoTokenKit. The SSH_SK_PROVIDER environment variable is the correct approach.
Step 4: Get Your Public Key
cat ~/.ssh/id_ecdsa_sk_rk.pub
Output:
sk-ecdsa-sha2-nistp256@openssh.com AAAAInNrLWVjZHNhLXNoYTIt... ssh:
That ssh: at the end is the FIDO2 application ID — it’s part of the key, not a comment. You can add your own comment after it when copying to authorized_keys:
sk-ecdsa-sha2-nistp256@openssh.com AAAAInNrLWVjZHNhLXNoYTIt... ssh: macbook-secure-enclave
Step 5: Copy to Your Server
ssh-copy-id -i ~/.ssh/id_ecdsa_sk_rk.pub user@your-server
Or manually paste the public key (with your comment) into ~/.ssh/authorized_keys on the server.
Step 6: Configure ~/.ssh/config
🚨 Problem #3: SSH Doesn’t Find the Key
After setting everything up, I tried to SSH… and it asked for my password. 😤
The verbose output (ssh -vvv) showed SSH was only trying my old RSA key:
debug1: Offering public key: /Users/sergii/.ssh/id_rsa RSA SHA256:...
The problem: SSH doesn’t automatically look for files named id_ecdsa_sk_rk. It only auto-discovers standard names like id_rsa, id_ed25519, id_ecdsa.
The fix is to explicitly add it to your ~/.ssh/config:
Host *
    IdentityFile ~/.ssh/id_ecdsa_sk_rk
    IdentityFile ~/.ssh/id_rsa
    IdentityFile ~/.ssh/id_ed25519
SSH tries identity files in order, so put the Secure Enclave key first if you want it to be the default.
⚠️ Note: If you’re using 1Password’s SSH agent (IdentityAgent), it might conflict with this setup. I had to comment it out while testing.
Step 7: Test It
ssh user@your-server
You should get a Touch ID prompt, then connect. 🎉
The Ugly Touch ID Prompt
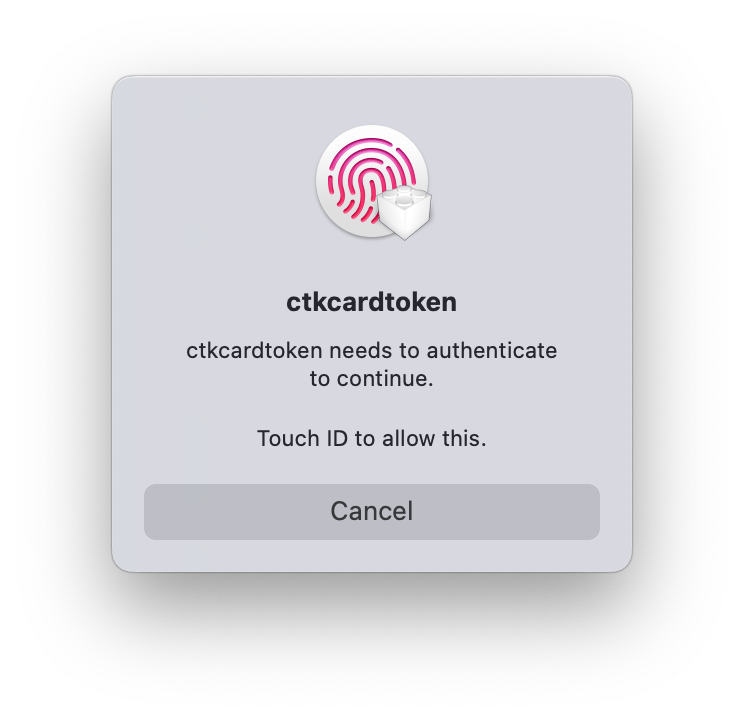
One thing I’m not thrilled about: the Touch ID dialog says “ctccardtoken needs to authenticate to continue” instead of something friendly like “SSH wants to use your key.”
This is because the prompt comes from CryptoTokenKit — a low-level framework that Apple hasn’t polished for end-user SSH. If this bothers you, Secretive provides a much nicer UI while still using Secure Enclave under the hood.
Why Touch ID for Everything?
I initially thought about creating two keys — one with Touch ID for “important” servers, one without for convenience (like Git operations).
But then I realized: without -t bio, malware could use my key silently. With -t bio, I always know when something is using my SSH key. A few extra taps per day is a small price for that visibility.
So my recommendation if you’re planning to store your SSH keys this way: just use -t bio for everything. If it ever gets annoying, you can always create a second key later.
The Catch: No Backups
Secure Enclave keys are tied to your specific Mac. If your Mac dies, the keys die with it.
This isn’t a bug — it’s the whole point. The key is unexportable by design.
The solution isn’t backing up the key — it’s having multiple keys. Add your Secure Enclave key AND a backup key (from a YubiKey, or another Mac) to your servers’ authorized_keys. If one device is lost, you still have access via the other.
Final Thoughts
It seems to be a proper way to store your SSH keys securely, and it is way better than storing them on your hard drive.
With the implementation above you get:
- ✅ Private key literally cannot be stolen (it’s in hardware)
- ✅ Every SSH operation requires Touch ID (I know when my key is used)
- ✅ No third-party apps needed
- ✅ Works with existing
authorized_keysworkflow
However, I’ve been somewhat surprised by the ugliness of the UI. Not sure why Apple released such an unpolished thing. In each and every presentation they have a section on security (where their Apple logo becomes an Apple lock), so I was expecting an actual aesthetically appealing look for their security features. It is definitely not the case. My sense of beauty is not compatible with this ugliness, so I will be looking into other solutions to store my SSH keys in Secure Enclave such as Secretive.
And I would need to continue my experiments anyway, because I need a backup option in case anything happens to my Mac. So stay tuned.
Have questions or run into different issues? Let me know in the comments!